Our premium 3D printing filament offers versatile options for designers at all levels, designed to free your imagination and deliver outstanding results.
You must have experienced one of the following scenarios:
Always being "dictated" by the mobile phone's notification sound; unconsciously have a glance at it each time a message pops up on the mobile phone.
The mobile phone nearly never leaves your hand even when eating... If you forget to take your mobile phone with you or the mobile phone is power off, you get uneasy all the time.
Thinking swiping your phone in a few minutes before going sleeping, while several hours passed and you are still awake in there…
Inadvertently, mobile phones are stealing a large amount of time from us, leaving us there unable to concentrate on work and study.
In response to the above situations, Corey Marchetti designed a phone holder aimed at motivating us to leave the phone alone. He made it a real physical stuff through 3D printing. Let’s take a look at it via a magic video:
When you put your mobile phone on the holder plate, it drops and displays "WORK". When you pick up the mobile phone, the holder plate rises and displays "PLAY". PLAY or WORK, it’s a question each time you touch you mobile phone…Motivational phone holder.
Part 1: Creator's design originality
Once in a time when Corey Marchetti was working on a project he realized he was always distracted by phone and couldn't get any work done. So he decided to create a little desk device as a solution to the problem.
The design inspiration mainly comes from food scales and electronic page-turning calendars. This phone holder uses rack and pinion gears as the mechanism for the flipping and extension springs for it to return to normal. The following video shows it:
Corey Marchetti named this funny desktop gadget as "motivational mobile phone holder". "This has helped me to keep my phone distractions to a minimum and hopefully it works for you too", Corey Marchetti said so. It is indeed an inspirational gadget!
Part 2: Motivational phone holder 3D printing
Have an itch to make a motivational phone holder by yourself? Let's do it now!
Step1: Download the motivational phone holder model
Corey Marchetti online shared his model file as well as attached a super detailed installing tutorial. Click to see: https://thangs.com/CM-Design/Motivational-Phone-Holder-24812
Step 2: Motivational phone holder model slicing
As main operations within 3D printer slicers are similar, getting familiar with one slicer is enough. Since my 3D printer is of Flashforge brand, I used FlashPrint slicer. This motivational phone holder is composed of 10 parts. We need to slice them one by one. My Flashforge Adventurer 4 is big enough so that I can put and slice more than one part at once.
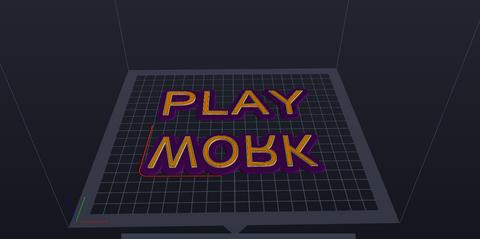
1) Play lettering and Work lettering put together.
Use Rotate and Move in the slicer to adjust the parts’ position to a proper place. I didn’t use Scale for all of the parts, because this is the simplest way to ensure all the parts keep at the same scale and matching each other when assembling them.
Know more about slicer steps, such as scale, adding supports, model slicing, and parameter setting, welcome to read my article:
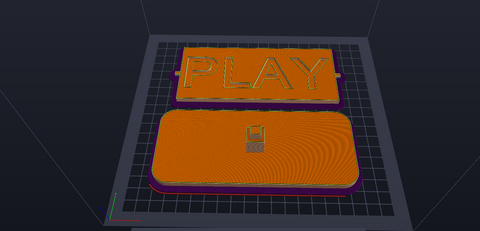
2) Work and Play panel and Phone holder plate put together.
The same as the above letters, no support is needed for the panel part and the plate part. Just remember to enlarge the distance between the model parts and their raft at Slicing setting, in this way you can easily dismantle the raft after finishing printing.
3) The internal mechanism part
Notice: when adding support, please remove all little short supports within the gear racks, for it’s hard to clearly remove them all in there after printing. The little supports inserted in the small gaps, the rack and gear mechanism of the motivational phone holder will get ineffective. It’s okay to success in printing such rack structure without adding supports.
4) The external enclosure part and others
The external enclosure part and other parts are regular-shape stuff. Easy to lay out and adding supports. Just well adjust its position, add supports as default setting, and click slicing.
Step 3: Motivational phone holder printing
Choose filament colors properly so as to get a beautiful final print. I used white filament for the external enclosure part and pink color for other parts. The internal mechanism is inside the enclosure box so that its color is hidden, not causing much difference on the outlook of the final print.
Here is a warm tip. The external enclosure part is a longer project that consumes much filament. Please make sure the filament left on your filament roll is enough to finish printing.
Part 3: Practical printing
Plug in the U-disk where you save your sliced files. Now we are doing touch screen operation. Select one file and click “build” and leave it to time! I used 3 days to finish printing all the 10 parts. See my final print:
Write in the end
Owning a 3D printer, you can make what you want. It’s especially good for those who want make customized stuff, helpful to display their originality and creative ideas just like Corey Marchetti, the creator of this motivational phone holder. Welcome to use Flashforge 3D Printers to make your brain ideas into reality. Also, hope everyone who read this article gets rid of the heavy dependence on mobile phones, and use your time to do more meaningful things.